
So far my journey into NativeScript Vue has been pleasant. The development experience is really well done and using Vue with NativeScript just feels like a natural fit. This particular topic (working with the camera) is the only time I've really been frustrated, and as I've been doing now for 6000 posts (yes, this is blog post number 6000), when I get frustrated with something I try my best to write it up in a way that will help others. Before I go any further I want to point out that I got some great help from folks on the NativeScript Slack group. Most recently, @bundyo, helped me get to the finish line for this demo and was helpful in my last post as well. Finally, I want to point out that the client I'm working on only needs to support Android, so I only tested this with Android. There's only one part that concerns me in terms of what iOS would do differently and I'll try my best to point that out so folks know what to look out for.
The goal of this post is actually a bit more than the title suggests. Yes, I wanted to test the camera in NativeScript, but I also wanted to test file uploading to a server. In both cases, I ran into quite a bit of difficulty. This was a bit surprising, as "camera picture/upload demos" are pretty trivial in Cordova. I'm still not 100% happy with my resolution here but if this is the worst I have to deal with in NativeScript, I'm still pretty damn happy about it. Alright, that's enough backstory, let's get into it.
Working with the Camera
Let's immediately begin with the first "gotcha" - unlike the Cordova Camera plugin, the NativeScript Camera plugin only supports the Camera, and not the gallery. That isn't a big deal as there are other plugins for that (you'll see the one I chose in a second), but you'll want to be aware of it.
No big deal - but when I first started looking at the docs, I ran into some issues. The docs mention that permissions are required to use the camera and show this API:
Newer API levels of Android and iOS versions are requiring explicit permissions in order the application to have access to the camera and to be able to save photos to the device. Once the user has granted permissions the camera module can be used.
camera.requestPermissions();
That's trivial - but the docs never really explain how this API works, what the result is, and so forth. Shown as it is in the docs initially:
camera.requestPermissions();
The implication is a blocking request that can be used before you call the rest of the camera API. Nor do the docs mention what the behavior is in general after the app has been used.
Based on my testing, the API actually returns a Promise. That's pretty crucial information that doesn't seem to be documented (issue #139).
Another piece of crucial information, and one that's obvious but I had not used the camera in a while, is that you must add this to AndroidManfest.xml:
<uses-permission android:name="android.permission.CAMERA"/>
I lost maybe two hours of time because I missed this. Literally one dang line in the docs in that permissions section would have helped (issue #140).
So with that out of the way, let's look at a simple example.
<template>
    <Page>
        <ActionBar title="Camera Tests FTW!"/>
        <StackLayout>
			<Button text="Take Picture" @tap="takePicture" />
			<Image :src="img" width="75" height="75" />
        </StackLayout>
    </Page>
</template>

<script>
import * as camera from "nativescript-camera";

export default {
	data() {
		return {
			img:''
		}
	},
	methods:{
		takePicture() {
			camera.requestPermissions()
			.then(() => {
				camera.takePicture({ width: 300, height: 300, keepAspectRatio: true, saveToGallery:true })
				.then(imageAsset => {
					this.img = imageAsset;
				})
				.catch(e => {
					console.log('error:', e);
				});
			})
			.catch(e => {
				console.log('Error requesting permission');
			});
		}
	}
}
</script>
Let's first consider the layout, all two items in it. I've got a button and an Image element that is initially blank. Nice and simple. The code, specifically takePicture() is the crucial part. You can see my call to requestPermissions() first, and in the result I then attempt to take a picture. All of the options passed in there are optional, and I highly recommend not using saveToGallery:true while testing, otherwise your photo roll gets filled with a crap ton of test pictures. Consider this beautiful example.
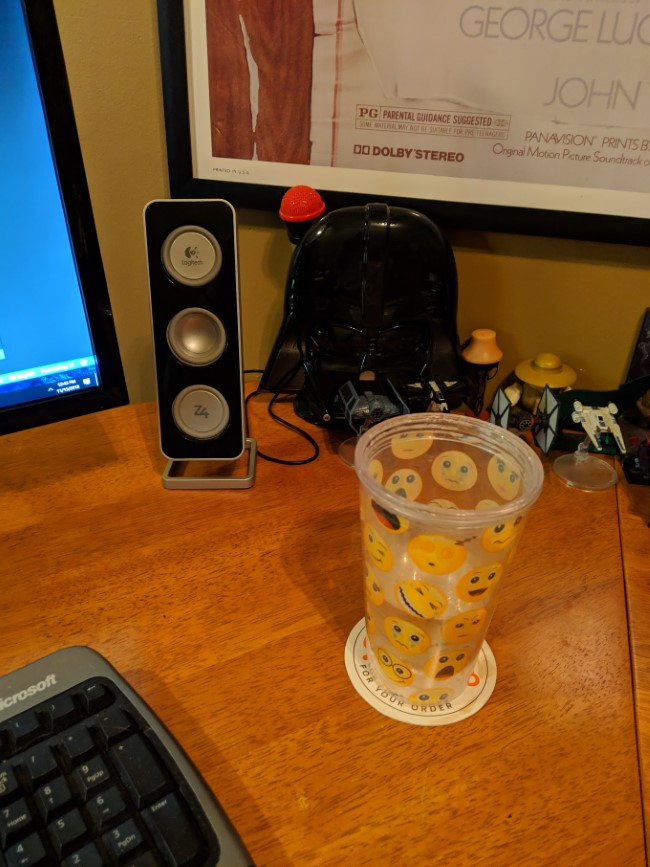
That's not bad. Again, it was painful due to doc issues, but once I got past that, it was all rainbows, unicorns, and kittens. Let's kick it up a notch!
Adding in Gallery Support
In my application, I need to let the user take a new picture or select from their gallery. As I said above, while this is baked into the main Camera plugin for Cordova, it isn't included in NativeScript's Camera plugin. No worry - there's a plugin for that: NativeScript Image Picker. This has a simple to use API and lets you do things like allow for one selection or multiple. I had zero problems with this one. I updated my demo to add a second button and then defined the results as an array of images.
<template>
    <Page>
        <ActionBar title="Camera Tests FTW!"/>
        <StackLayout>
			<Button text="Take Picture" @tap="takePicture" />
			<Button text="Choose Picture" @tap="selectPicture" />
			<WrapLayout>
				<Image v-for="img in images" :src="img.src" width="75" height="75" />
			</WrapLayout>
        </StackLayout>
    </Page>
</template>

<script>
import * as camera from "nativescript-camera";
import * as imagepicker from "nativescript-imagepicker";

import { Image } from "tns-core-modules/ui/image";

export default {
	data() {
		return {
			images:[]
		}
	},
	methods:{
		selectPicture() {

			let context = imagepicker.create({
				mode: 'multiple'
			});

			context.authorize()
			.then(function() {
				return context.present();
			})
			.then(selection => {
				selection.forEach(selected => {

					console.log(JSON.stringify(selected));

					let img = new Image();
					img.src = selected;
					this.images.push(img);
				});
			}).catch(function (e) {
				console.log('error in selectPicture', e);
			});

		},
		takePicture() {
			camera.requestPermissions()
			.then(() => {
				camera.takePicture({ width: 300, height: 300, keepAspectRatio: true, saveToGallery:false })
				.then(imageAsset => {
					let img = new Image();
					img.src = imageAsset;
					this.images.push(img);
					console.log('ive got '+this.images.length+' images now.');
				})
				.catch(e => {
					console.log('error:', e);
				});
			})
			.catch(e => {
				console.log('Error requesting permission');
			});
		}
	}
}
</script>
Here's a quick screen shot - and the images are probably too small to even decipher what they are - but I took two pictures and selected two from my gallery.
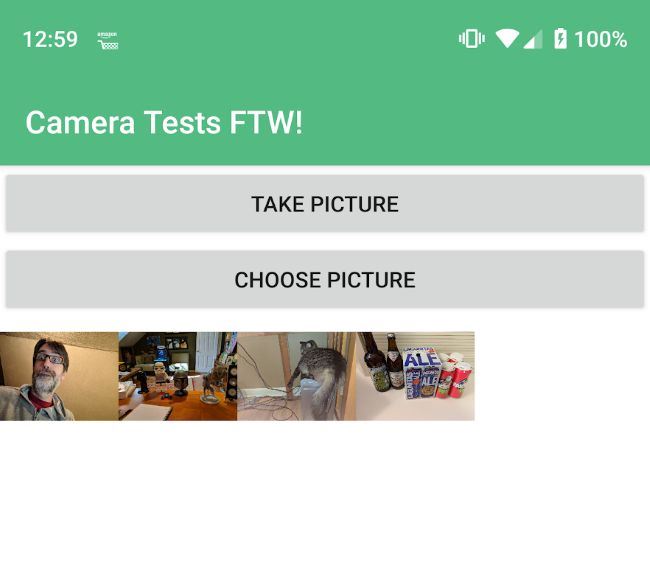
Woot! EVERYTHING ELSE WILL GO PERFECTLY!
Uploading Files to Hell I Mean the Server
Alright... so... here's where things took a dark turn. Like, really dark.
My soul is freezing. I fear seeing another day—another day filled with this emptiness. pic.twitter.com/9W3bGxDbRz
— Black Metal Cats (@evilbmcats) November 13, 2018
So, in the past I made use of the FileTransfer plugin with Cordova. Nowadays I'd probably use the Fetch API instead. However, I saw a lot of people recommending the nativescript-background-http plugin. I found this plugin to be very poorly documented and I ran into a lot of issues using it. To be fair, I'm fairly certain half my issues were with how I tested, but overall it was a pretty poor experience. I'd strongly consider going back to Fetch(), but as far as I know, it can't stream from a filename and has to read into memory first, which I wanted to avoid.
I immediately focused on the multipartUpload aspect of the docs, which has this for a code sample:
import * as bghttp from "nativescript-background-http";
var session = bghttp.session("image-upload");

.....
var request = {
		url: url,
		method: "POST",
		headers: {
			"Content-Type": "application/octet-stream",
			"File-Name": name
		},
		description: description
	};

	if (should_fail) {
		request.headers["Should-Fail"] = true;
	}

let task: bghttp.Task;
var params = [
			{ name: "test", value: "value" },
			{ name: "fileToUpload", filename: file, mimeType: 'image/jpeg' }
		];
task = session.multipartUpload(params, request);
My issue with this (and I filed #184 and #185) was trying to figure out a) what sessions were and b) how do you know when the upload is complete. The examples help, but honestly I expected the readme to include just a bit more information. Specifically the fact that the task object above is going to emit events that you can listen to in order to track the progress. These events aren't ever documented in terms of what is passed to them. Also, I never did figure out what sessions are in terms of the plugin.
With all that in mind - I began my attempts to upload images. I first tried hitting Postman Echo, which is a great free service from the folks behind Postman. However, I kept getting an error and couldn't figure out why. I then switched to a local Node server using Formidable and proxied it via ngrok. I forgot the ngrok part but remembered my phone needed a way to hit my desktop machine.
As far as I can see, the code below works fine. The Content-Type header is not the same as the official docs, but it seems to make more sense. (Again, thank you @bundyo.) Also, this code doesn't actually do anything when done. It should probably disable you from picking more pictures and then clear out the array, but this was just a prototype for the greater project I'm working on.
upload() {
	if(this.images.length === 0) return;

	let session = bghttp.session("image-upload");
	let request = {
		url: 'https://b3ababb0.ngrok.io',
		method: 'POST',
		headers: {
			"Content-Type": "multipart/form-data"
		}
	};

	var params = [
		{ name: "test", value: "value" }
	];

	let counter = 0;
	this.images.forEach(i => {
		params.push(
			{
				name:'image' + (++counter),
				filename: i.src.android,
				mimeType:'image/jpeg'
			}
		);

	});

	let task = session.multipartUpload(params, request);

	task.on('error', e => {
		console.log('error', e);
	});

	task.on('complete', e => {
		console.log('complete', JSON.stringify(e));
	});

},
This part in particular is important (and possibly wrong):
i.src.android
This comes from the ImageSource instances used to drive the list of pictures coming from either source. Yes, there is an i.src.ios key too but I'm not convinced it will work in iOS.
And that's basically it. In my testing, I'm still noticing a few errors so I'm not 100% convinced this is solid, but it was enough for me to blog and share - and obviously if folks see anything stupid/dangerous/etc please speak up.
Header photo by Jakob Owens on Unsplash
Archived Comments
Hi Raymond. I had a similar experience working with nativescript-background-http. In fact I had to drop it. In my case I needed to upload simple signature image files to the server . I ended up using nativescript-https. I converted the image file to a string and that took some figuring out because the docs are not clear on this. Here is my code:
const commonUtils = require("../shared/common");
const imageSourceModule = require("tns-core-modules/image-source");
const CircularModalViewModel = require("./circular-modal-view-model");
const circularModalViewModel = new CircularModalViewModel();
const LoadingIndicator = require("nativescript-loading-indicator").LoadingIndicator;
const loadingIndicator = new LoadingIndicator();
let page;
let dataform;
let mySignature;
let myButton;
function onShownModally(args) {
page = args.object;
dataform = page.page.getViewById("myDataForm");
mySignature = page.page.getViewById("mySignature");
myButton = page.page.getViewById("myButton");
mySignature.visibility = "collapsed";
page.bindingContext = args.context;
}
function onCloseModal(args) {
args.object.closeModal();
}
function onTapNext(args) {
dataform.validateAll()
.then((result) => {
if (result === true) {
dataform.commitAll();
console.dir(dataform.editedObject);
dataform.visibility = "collapsed";
mySignature.visibility = "visible";
if (myButton.text === "Submit") {
const drawingPad = page.getViewById("myDrawingPad"); //get drawing pad id
drawingPad.getDrawing().then((signature) => {
loadingIndicator.show();
// console.log(signature.getWidth());
const resized = resize(signature, 300); resize the signature
// console.log("first: "+resized.getWidth());
//https://github.com/bradmart...
const image = imageSourceModule.fromNativeSource(resized);//1
const base64 = image.toBase64String("png"); //2:
//do 1 and 2 to convert image to base64
//once the image is a base64 you can upload to server using
//fetch module, http module or in my case: nativescript-https
circularModalViewModel.upload({ object: dataform.editedObject,
circularID: page.bindingContext.circularID,
signature: base64 })
.catch((error) => {
console.log(error);
loadingIndicator.hide();
}).then((response) => {
loadingIndicator.hide();
commonUtils.showFeedBack({
title: "Success!",
message: "Your information was sent successfully.",
duration: 7000
});
exports.onCloseModal(args);
});
});
}
myButton.text = "Submit";
}
}).catch((error) => {
console.log(error);
});
}
function hideSignature() {
dataform.visibility = "visible";
mySignature.visibility = "collapsed";
myButton.text = "Next";
}
function clearSignature(args) {
const drawingPad = page.getViewById("myDrawingPad");
drawingPad.clearDrawing();
}
function resize(sourceImage, targetWidth) {
const sourceWidth = sourceImage.getWidth();
if (sourceWidth < targetWidth) {
return null;
}
const sourceHeight = sourceImage.getHeight();
const adjustedHeight = (targetWidth * sourceHeight) / sourceWidth;
const resizedImage = android.graphics.Bitmap.createScaledBitmap(sourceImage, targetWidth, adjustedHeight, true);
return resizedImage;
}
exports.onCloseModal = onCloseModal;
exports.onShownModally = onShownModally;
exports.onTapNext = onTapNext;
exports.hideSignature = hideSignature;
exports.clearSignature = clearSignature;
Hi Raymond, did you test it with Android Studio as well or just with your phone? Because I've been playing around with Studio and the emulators and I've had nothing but issues and weird error messages.
Hi Raymond, thanks for this, extremely useful. Do you have any examples in Nativescript to handle video. I'm not sure why the Nativescipt developers haven't included video support in the camera plugin, it seems an obvious thing to do. I've tried a few alternative plugins but not had much luck as I also need to upload to a server. I'm developing for iOS at the moment.
I generally just test with my phone, a Pixel 3 XL. I do use the emulator from time to time but not usually. If I remember right, when I was struggling w/ the camera I did try the emulator too, but it didn't help.
Sorry no, I haven't tried that yet.
I figured it out already, thanks! One of the things that made it break was putting it in mounted(). Calling it with a separate method via a button just works normally.
Hi raymond, can you share what is the error you encounter before using ngROK? Im using laravel php for my backend and already setup my url to https via ngRok. Rightnow Im receiving error "NAMESPACE of undefined" which I dont no were I got wrong. Hope you have idea on this. Thanks
Not quite sure what you mean. I needed ngrok so that my desktop server would be hittable from my phone. It was just a proxy really. As to your second part, I'd need to know more, like where it happened, etc.
Under nativescript-background-http documentation says i need https url for Android Pie or later. So thats why I setup kinda same as yours. :) Btw the error come up under upload method.
Exact line:
`let task = session.multipartUpload(params, request);`
PS:
using POSTMAN my upload api works fine.
Sorry - really not sure what's up there.
no worries. Ill update you when I have any progress on my issue. thanks for the reply
Update: after reinstalling plugin and platform your code works perfectly. thank you so much <3
Glad to help!
Wow..
First time trying naivescrit and your article make me happy.
Glad it helped!
I just visited your YouTube channel, and watching 'From Vue to NativeScript-vue'. Love you man 😘