A Look at Pipedream

Every now and then folks will reach out to me to share interesting tech/sites/etc that they would like my opinion on. I like this as it gives me a chance to learn something new and a lot of times it leads to blog posts that I can share with my audience. Nearly a year ago the folks at Pipedream reached out to me and - unfortunately - I never really got a chance to look into their product. Friday I was about to hit the Archive button as it was the oldest email in my inbox and sometimes you just have to let go. (It feels great to do that sometimes.) Instead, I clicked around a bit and I've got to say - I am incredibly happy I did so. Pipedream is a really neat product and something I absolutely want to tell other people about.
Pipedream describes itself as an "integration platform built for developers." It focuses on what it calls workflow that are run on their platform at no cost. (As their pricing page says though in the future they may offer additional features on a paid tier.)
Workflows are - essentially - pieces of logic that you put together in a linear fashion. Your workflow will execute step by step. This isn't anything new. I know Lambda supports steps as does Azure Functions. For me, my experience with this type of setup was with OpenWhisk sequences. It was one of my favorite aspects of OpenWhisk as it made it incredibly easy to set up complex applications by piecing together different bits of logic. A lot of times I'd take parts that were pre-built and simply stick a bit of custom logic in the middle. Pipedream reminds me a lot of this.
Your workflows are comprised of a few different parts. You begin with a trigger which is how the workflow is initiated. This can be via URL (ie, someone hits the URL to start it), a CRON schedule, or email (ie, you send an email to the address to start it).
Next come your steps. These steps are bits of Node.js code that you can do pretty much anything with, or a pre-built "action" that encapsulates code for you. Steps are processed one by one. They can have their own data, take input, return output, etc.
The actions are where things get really, really freaking cool though. As an example, I like working with the Twitter API. I've built a few bots, search tools, and so forth. The Twitter API is rather simple to use. However the authentication part can be a bit hard to work with. Pipedreams literally turns this into a "click and login" flow and you're done. I cannot stress how cool that is (going to demonstrate it in a second) and how excited I am about using the platform to build my usual style of stupid demos.
That was a longish intro so let's walk through an example. I'm going to build a workflow that will search Twitter every hour for a keyword. It will take the results, format them nicely, and then email it. The following example is a modified version of one created by Dylan Sather - one of two folks at Pipedream who answered a crap ton of annoying questions from me. I'm rebuilding it from scratch to demonstrate that the process is like. (But get this - you don't have to. At the end I'll share a link to his workflow that you can copy to your account in one click.)
Ok, assuming you've signed up for Pipedream, your default view is a dashboard of your workflows:
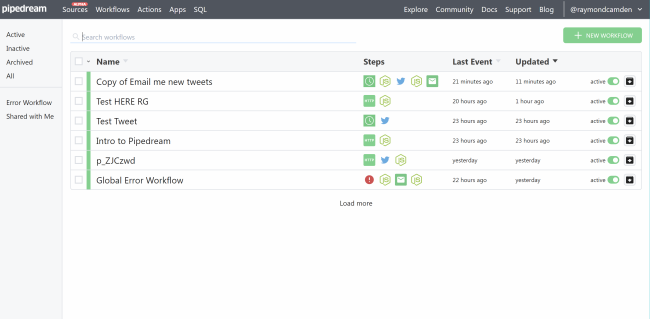
Begin by clicking the big obvious green New Workflow button.
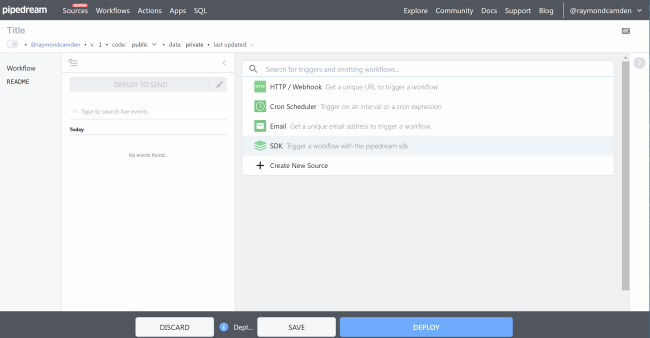
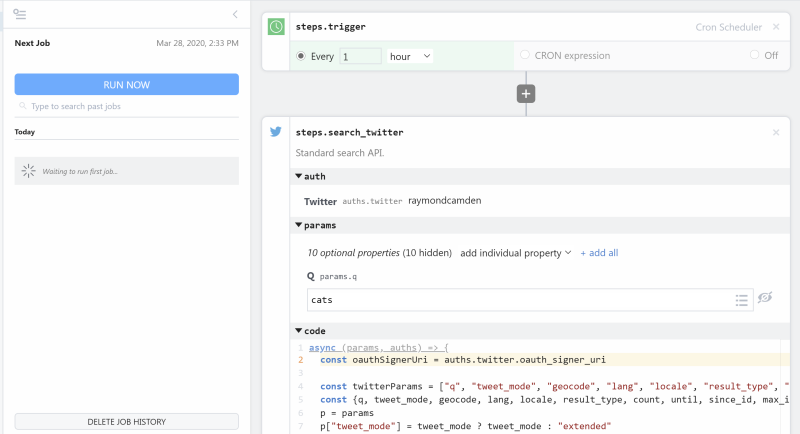
This is the default dashboard for working with workflows and there's a lot going on in it. One of the issues with the site now is that they don't use a lot of alt text on their images and sometimes it's difficult to know what a particular UI item does. I've let them know this and they're working on correcting it. Right now though I'm going to focus on two parts. I'm going to give it a title (upper left hand side) and then select the "Cron Scheduler" trigger as I want a time based workflow:
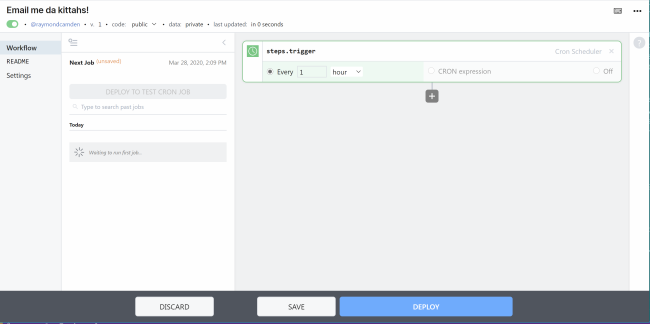
Note that the Cron trigger has both a simple and complex view which I really appreciate. Cron syntax makes regex look friendly so I like having a simpler way to define my timing schedule.
Ok, so notice the + sign below my trigger. Clicking it gives you a quick form to select your next step.
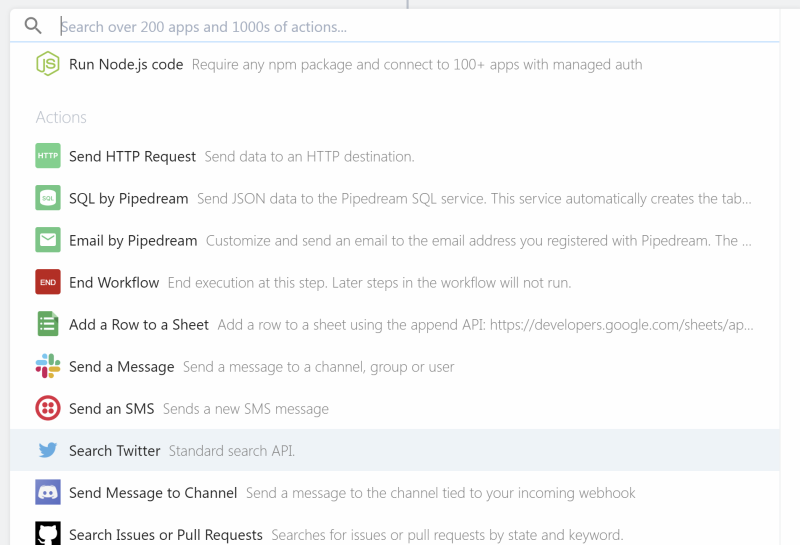
I'm going to select the "Search Twitter" action:
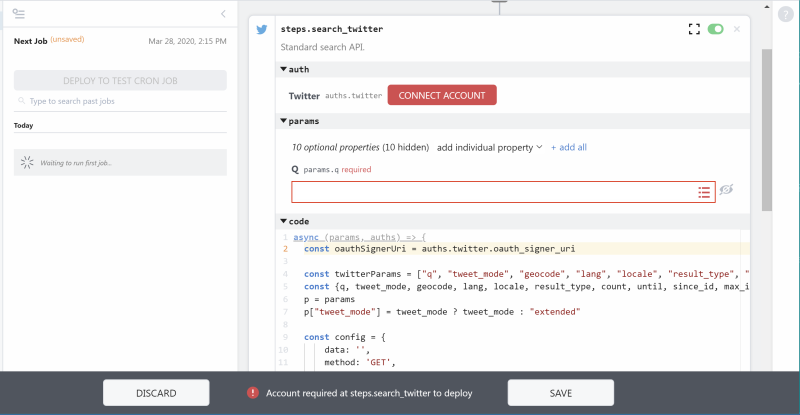
So it was a bit hard to fit this into a screen shot but I want to point out a few things. First, I love the big obvious warning at the bottom. It's making it clear I need to connect this to an account. Then note the big red button in the step itself. That's what I'll click to connect the workflow to my Twitter account. Next notice params. It's showing you one param, q, which is your search term. There's more properties but this action takes a sensible view of, "90% of the time all you need is this one param." I've noticed this in a bunch of actions and it's really nicely done.
What you see only partially in the screen shot is the code. You do not have to modify anything here at all. But what's awesome is that if you do want to do a customization, you just click and start editing. The editing experience is great (although I wish it had a full screen view) with syntax highlighting and code completion.
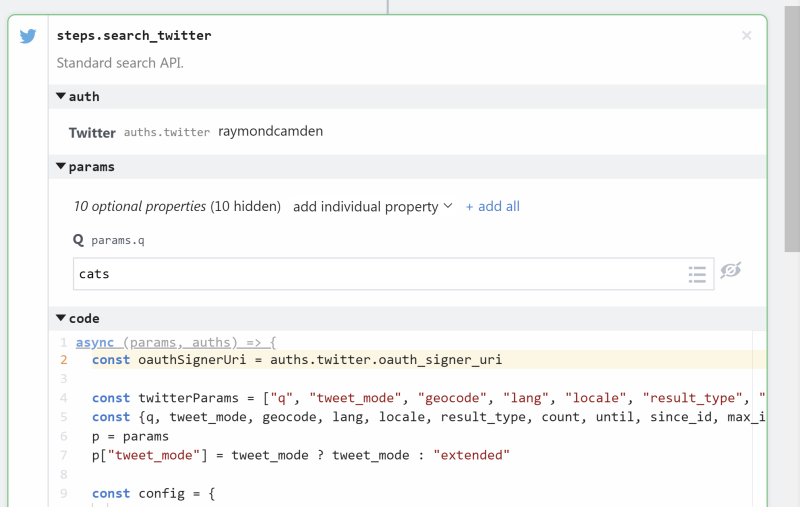
I clicked connect account and selected my current account and then entered a term.
Next we'll add a new step and select "Run Node.js code". This is where we'll write some custom logic. I'm going to take the results from the Twitter search and make it better for an email.
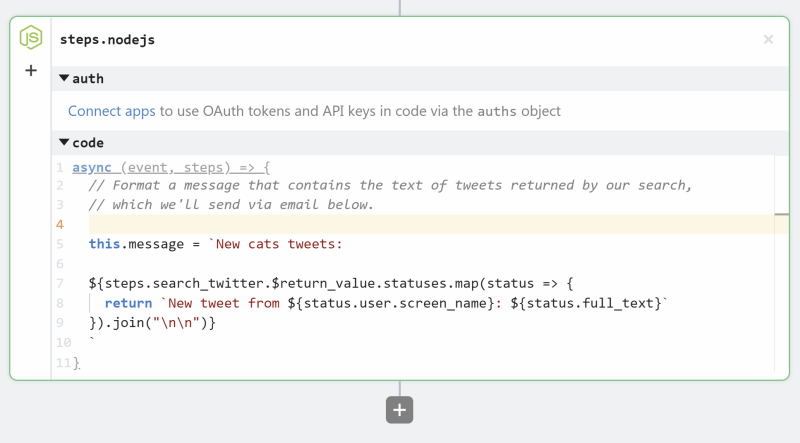
Basically it creates a variable, this.message, and populates it with the result of the previous step. Note how it access it via steps.search_twitter.$return_value. Also note that by writing to this.message the value will be available in later steps.
For the final step I'll click add again, and select "Email by Pipedream":
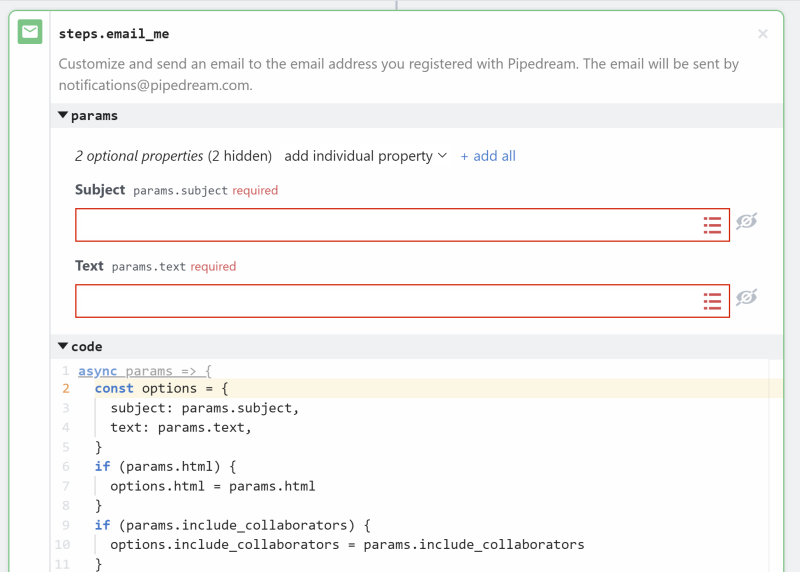
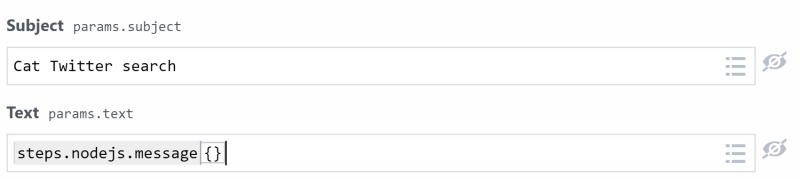
This step automatically emails me, the workflow owner, so I just need to customize the subject and message text. For subject I simply entered a hard coded value. For text, I can address step data by typing "step" and the field autocompletes as I typed. My previous step was named "nodejs" (that's a default value and you can, and should, rename your steps) so I ended up with the following values:
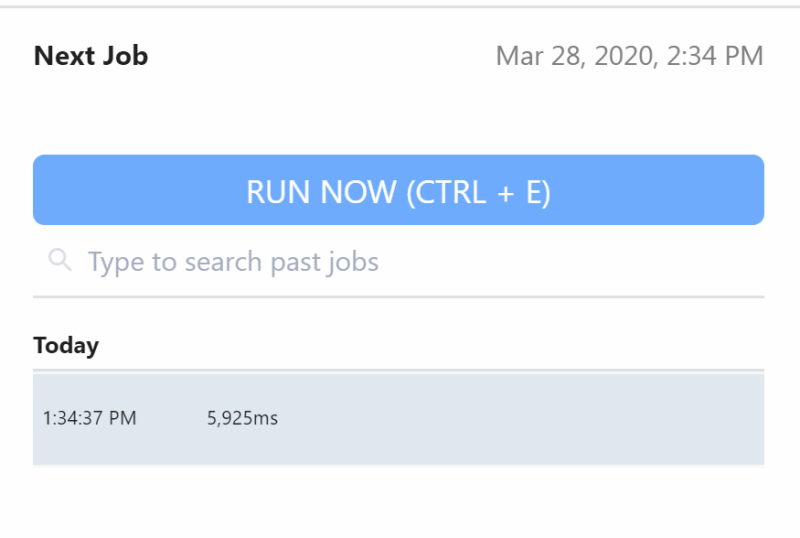
The last thing I did was click Deploy. Now for the fun part - you can test your workflow by hitting "Run Now":
What's cool now - and it wasn't completely obvious to me at first - if you click the event now you will see the data in the workflow itself - ie you'll see the results in every step. So I click the execution first (and note it flags errors here in a quick to read way as well as execution time):
After you click it, then go to a step, like the search twitter one, to see the result data:
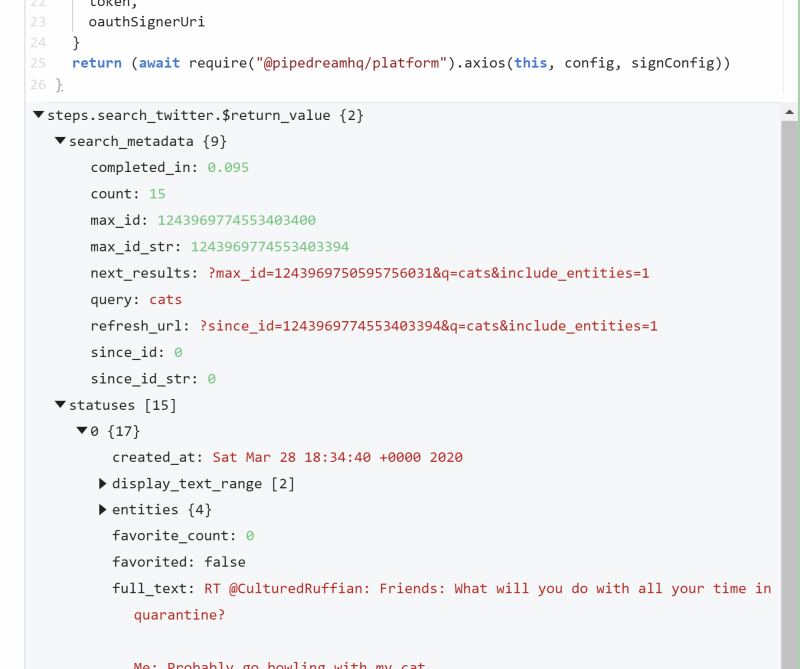
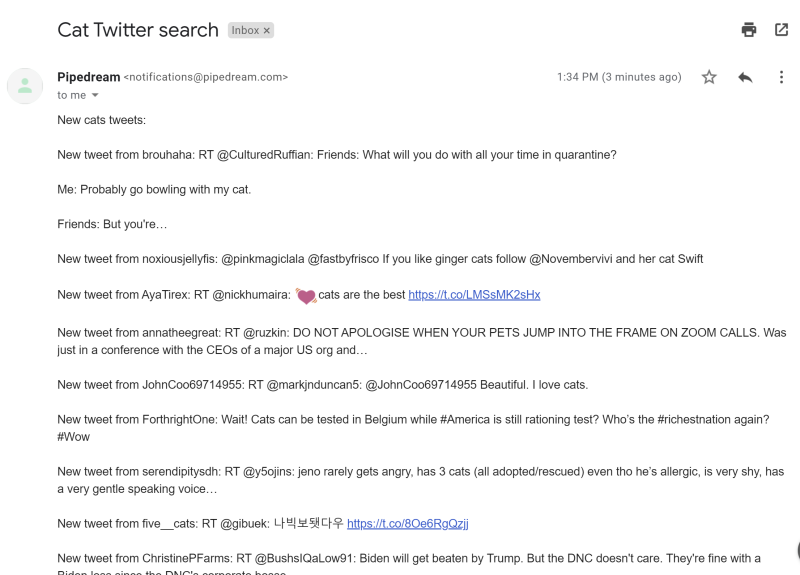
This is really useful for debugging. I'll also note that you can use console.log and see the messages. And here's the email:
As I said, it's easy to copy and reuse workflows. You can find mine here but I'd suggest the nicer one by Dylan.
Definitely give it a shot. There's other features I didn't mention, so check their docs for more or wait because I've got a few ideas for more blog posts next week. :)
Header photo by Crytal Kwok on Unsplash