Working with StrongLoop (Part Two)
Yesterday I blogged about StrongLoop and the ability to quickly generate APIs (Working with StrongLoop (Part One)). Today I'm going to write up a short post detailing how to switch from the in-memory database storage system to a 'real' persistent one. If you haven't read the previous entry, be sure to quickly scan it over or none of this will make sense.
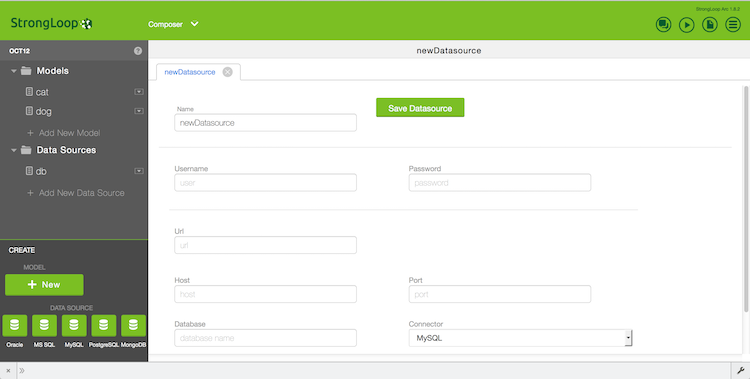
To set up a persistence system with your StrongLoop-enabled app, you'll want to set up a datasource. In the screen shot below you can see five different data source types. Clicking one will open up the appropriate editor.
For my testing, I decided to first try MySQL. I've got a local MySQL server running so I made a new database and user just for testing my local application. I entered the appropriate details and tried to save. I then got this:

This was surprising. Since I saw the icons in the nav I just assumed it was already supported. Luckily the error message not only tells you what is wrong but gives you a link to correct it. I literally spent the 2 seconds to use npm to add the connector and that's all it took. The web admin also provides a test button you may miss if you aren't paying attention. It is at the very bottom of the data source form.

The next step is to go to your model, each model, and update the data source to point to your new source.
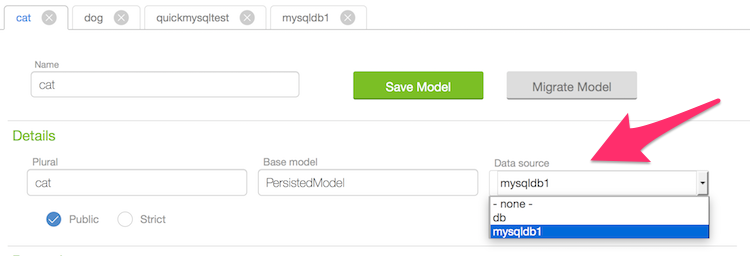
Remember, you need to do this for each model. I imagine most folks will use one data source per API, but certainly it makes sense to allow for multiple. What's cool too is that you can have an existing site with various models and then you can use the in-memory data source to test something new.
So at this point, you're done, right? Nope. I went to the explorer to test creating a new cat. When I did my POST, I got:
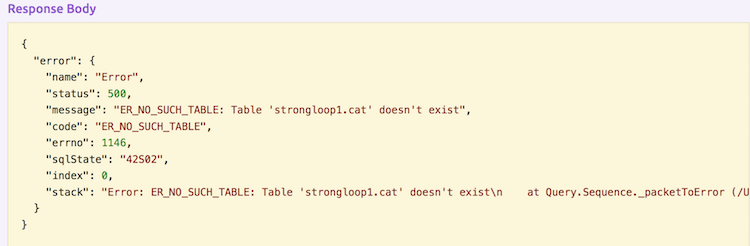
This is easy to fix - when you change the data source, click that "Migrate Model" button I had not noticed before:

Again, you will want to do this for each model. StrongLoop also provides a JavaScript API for data migration if you want to programmatically handle moving from one data source to another.
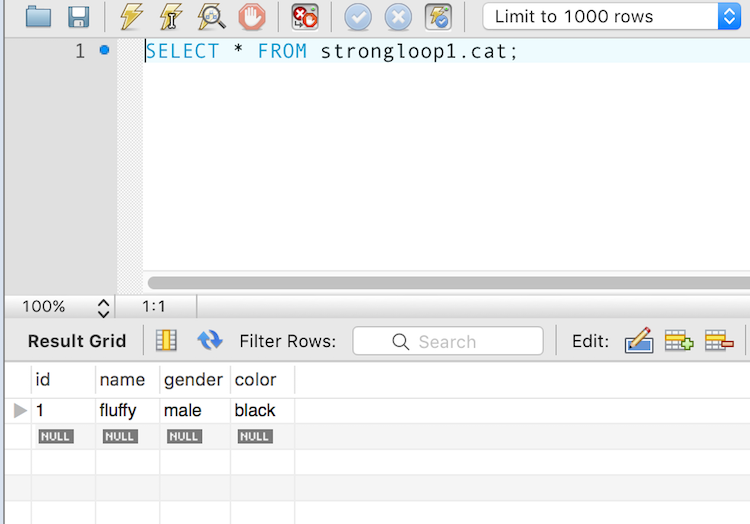
Once I did that for my cat and dog models, I hopped back over to the MySQL GUI and confirmed it:
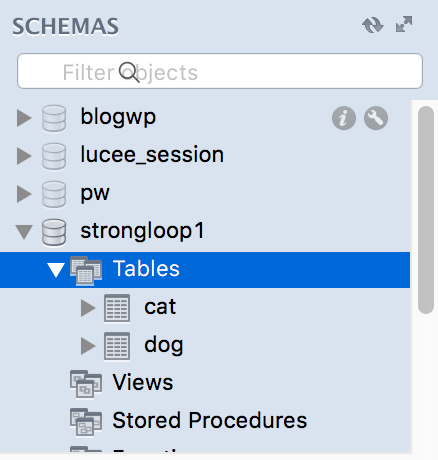
I then ran my POST to add a cat and confirmed it persisted as well:
And that was it! To be clear, everything I did visually with the StrongLoop web admin could also be done via the CLI or just pure files. In case you're curious, here is the datasources.json file I have for my application:
{
  "db": {
    "name": "db",
    "connector": "memory"
  },
  "mysqldb1": {
    "host": "localhost",
    "port": 3306,
    "url": "",
    "database": "strongloop1",
    "password": "12345",
    "name": "mysqldb1",
    "connector": "mysql",
    "user": "slc"
  }
}
So that's MySQL, what about Cloudant on Bluemix? The good news is that is also easy. My coworker Andy Trice covers it well here: Getting Started with Node.js LoopBack Framework and IBM Cloudant. Essentially, once you've gotten your Cloudant service up, it is one more npm call to install a connector, and then you can edit your datasources.json file to include the relevant information.
All in all - pretty darn nice. I love how I can quickly go from a quick in-memory test to a 'real' setup in a persistence system, and I like how many different options I have as well.