Rough guide to building Android PhoneGap apps from the command line
Let me start off this blog entry by saying that I've got no beef with Eclipse. Eclipse is an incredibly powerful IDE and a great platform for a lot of tools. Eclipse is awesome, mkay? That being said, I've been doing a lot of JavaScript, HTML, and, yes, CSS lately, and I've found the existing tools for Eclipse not to my liking. Also, I was looking for a tool that was a bit more, how shall we say, light weight? With that in mind, the primary editor I've been using lately is WebStorm by JetBrains. While not a free tool, it is relatively cheap, came highly recommended, and so far has been performing well. I've also been trying out Sublime Text 2.
Both of these tools work well, but the main thing I was missing was support for PhoneGap development. I've gotten quite used to the workflow within Eclipse of both creating an Android project and running it on my device. I knew that Eclipse was simply running command-line tools I had access too, so I decided I'd try to recreate this myself. Credit for all my success today goes to Fil Maj, fellow Adobian and part of the team that created PhoneGap. Any mistakes made here are my fault, and I definitely encourage folks to correct me.To begin, you want to ensure you have the core Android SDK downloaded and installed. In the past I've seen the SDK barf on paths that include spaces (really? yes - really) so ensure you install it to something simple, like the root of your C drive. You also want to ensure that the tools directory is in your path.
Go to where you want to create your project and make a new folder. For my testing, I created a folder called "phonegapapp1". Not very imaginative, but you get the idea.
The next step is to create the Android project. This is done with the "android" command and requires the following arguments:
- create project: This tells the tool what you are doing.
- --target X: This tells the tool what Android version you will be targeting. I had no idea what to supply here, but luckily there's a tool for that too: "android list targets". This outputs a long stream of targets. Find the one you care about and use that. Each target will have an ID value and a simple label. I wanted to support Android 2.2, which had the label of "android-8".
- --name X: The name of the application. I used phonegapapp1.
- --path X: The path to where the files should be created. I was in my folder, so I used "."
- --activity X: The "activity" value for your project. I used "App" since I noticed that was the name mentioned in the PhoneGap Getting Started guide.
- --package X: I used "com.camden.phonegapapp1".
You can find more details on the command line options for creating projects here: Managing Projects from the Command Line. My complete command looked like so:
android create project --target "android-8" --name phonegapapp1 --path . --activity App --package com.camden.phonegapapp1
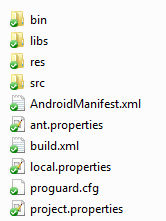
If everything worked right, you should see the following:
For the next step, you need to follow, partially, the PhoneGap Getting Started Guide for Android, obviously skipping the setup steps. Basically, go to step 3 and follow from there. HOWEVER there is one critical change. Instead of import com.phonegap., you want to use import org.apache.cordova.. It looks like this change is specifically required for PhoneGap 1.5, and is part of the process of the move to Cordova.
Ok, so now we are at the point where we have to build (compile) the project and put it on our device. Full documentation for this may be found here: Building and Running from the Command Line. The guide assumes you have Ant installed. If you've never used Ant before, well, you're missing out on one of the most useful tools ever created, but just hop over to http://ant.apache.org/ and download the binary. Also ensure the ant executable is in your path. Assuming you are still in the folder you created for your project, type:
ant debug
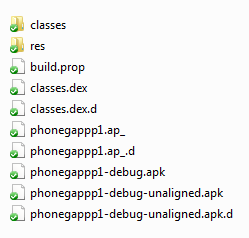
If you see "Build Successful" at the end, congrats, you should now have an APK file in your bin folder. Specifically, APPNAME-debug.apk.
The guide I linked to above also tells you how to create a release or release and signed build. Since I primarily just build stupid demos, I wasn't worried about that now.
The final step is to get it on your device. I assume you actually have a device and it's already connected. You can confirm this by running adb devices and confirming you see your device. The adb executable allows you to install and uninstall apps to your device. (And a lot more actually.) The install command is what we want, and generally looks like this:
adb install bin/your.apk
While this works, it will not refresh your installed application. Luckily, you can just add the -r flag:
adb install -r bin/your.apk
So to recap, after you've done the initial leg work, your development process involves:
- Edit your HTML, JS, and CSS files to bring the awesome.
- ant debug (creates an updated apk)
- adb install -r bin/your.apk (updates app on device)
I can see 2 big areas for improvement here. First, I'd like to build a script that would run the Android project creation and the manual file copy/modify steps to set up the PhoneGap Android folder. The second improvement would be to make a script that simply runs the ant debug, adb install pair all at once.