Implementing OAuth in Astro

As I continue to dig into Astro, one of the areas I wanted to explore was security and authentication. The Astro docs have an entire section on authentication in which they mention multiple different third party projects you can use with Astro, but I wanted to take a stab at building something myself. Once again I figured this would be a useful way to get some experience with parts of Astro I had not used yet, specifically sessions and middleware.
We all know what OAuth is... right?
I can remember being incredibly confused by OAuth in the past. Honestly I felt like I was the only one who didn't get it. So I forced myself to build a few demos in that area to help it click and I realized it wasn't terribly difficult to implement at all. My first explorations in this area were back in 2010, almost two decades ago, so it's definitely not anything new, but on the off chance that one of my readers needs an overview, I figure it can't hurt to share.
OAuth basically boils down to the idea of using a trusted third party to authenticate a user. "Typical" authentication systems required you to set up a users table in a database, carefully store credentials, and build a login process. OAuth is like saying screw that, if Google says a person is so and so, I trust Google.
With OAuth, you work with a third party (Google, Facebook, or many other services) to hand off the authentication process. You get information about the user (like their email address) and can use that as an identifier when storing data on your site.
OAuth also lets you perform actions based on a user. While you can use OAuth just to identify someone, you can also use it to do things like access their Google calendar, work with Facebook contacts, and so forth. Users see this when they authenticate with the third party as a warning (that they'll probably ignore) that says, "Once you login, the site will be able to do X, Y, and Z with your data."
Typical OAuth Flow
In most cases, you set up OAuth like so. First, on the third party site, you create an application that represents your site. So if you are building RaymondCamden.com as the go to place for - well whatever - your app will usually have the same name and a description that matches. This is also where you specify the permissions your app needs. It may just need the minimum - a profile that identifiers the user. But if you are building an integration that needs read or write access to data, you'll specify it there.
As part of the process, you also define a "call back url", which is where the user is redirected to after authenticating with the third party. This will be your app, and usually you have two - one for development and one for production. Some OAuth providers don't allow this and you end up creating two apps for your environments.
In your code, you then create a link to the third party. Their docs will tell you how to do this and you - of course - let the user know what's about to happen:
<a href="long ass url on Google">Login with Google</a>
When the user clicks this, they end up at the third part, login, get presented with the "The site will be able to do X with your stuff" prompt, and when confirmed, they return to the call back URL. When they do, a code will be in the URL. You take that code and send it back to the third party to get an access token. This access token lets you do stuff - stuff being whatever permissions you wanted. The token is short lived so it's not useful forever, but will work fine for a typical session.
My Demo
My Astro application makes use of Google as a third party login and will ask for Calendar read permissions. My app has a grand total of three pages:
- A home page with a link to login with Google
- A callback page the user doesn't actually "see", but handles the post-auth stuff
- An events page that works with the data the app has access to once the user logs in
To make this work, I'll use:
- Sessions to persist the access token.
- Middleware to route you based on your current status.
Ok, let's get started. I'm not going to show you the Google Cloud Console and such as the UI there is - obviously - unique to Google. But I can say I created an app and got a client id and client secret. I put these, and my callback url, all in a .env file:
CLIENT_ID=my_client_id_brings_all_the_boys_to_the_yard
CLIENT_SECRET=damn_right_its_better_than_yours
REDIRECT_URL=http://localhost:4321/callback
Yes, I named the the callback value REDIRECT_URL, but I'm ok with that. ;)
Enabling Sessions
Since I knew I would be using sessions through, I started off enabling sessions. I did this by using the Node adapter as I wasn't planning on actually deploying this live. And literally, that's all I did. When you add that, your astro.config.mjs is updating accordingly, but I also added output:'server' such that every route was dynamic:
// @ts-check
import { defineConfig } from 'astro/config';

import node from '@astrojs/node';

// https://astro.build/config
export default defineConfig({
  output:'server',
  adapter: node({
    mode: 'standalone'
  })
});
The Home Page
A real-world application will usually have a mix of pages that require login and those that do not. My simple app only has (visibly anyway) the home page with login and the page that uses your data. Therefore my homepage is literally just a login link:
---
import BaseLayout from '../layouts/BaseLayout.astro';

const CLIENT_ID = process.env.CLIENT_ID;
const REDIRECT_URL = process.env.REDIRECT_URL;

const getAuthURL = () => {
  let params = new URLSearchParams();
  params.set('client_id', CLIENT_ID);
  params.set('redirect_uri', REDIRECT_URL);
  params.set('response_type','code');
  params.set('scope','https://www.googleapis.com/auth/calendar.readonly');
  let url = 'https://accounts.google.com/o/oauth2/v2/auth?' + params.toString();
  return url;
}

// treat it like a flash var, get it and nuke it
let error = await Astro.session?.get('error');
if(error) Astro.session.set('error', null);
console.log('error',error);
---

<BaseLayout>

	<h1>Login</h1>

	{ error &&
		<p>This error was returned: { error }</p>
	}
	<p>
	Link to login <a href={ getAuthURL() }>here</a>.
	</p>

</BaseLayout>
The most complex part here is getAuthURL, which will almost always look like what you see here - a URL that includes the client id from the third party provider, the callback url (yes, you supply this on the third party site and in the URL), and permissions. Almost always your code will follow this format but I've seen redirect_url and redirect_uri pretty interchangeably.
One little trick here I do is look in my session for an error value. If it exists, I grab it, and remove it. This is a 'flash' var, basically a value set on one page and used once in another. Some platforms/frameworks have built-in support for this but doing it by hand isn't too difficult - I simply delete it if exists.
In the HTML, I render that error if it exists and then the login link. I'd share a screenshot but it's literally just a link. :)
I will share a screenshot of what you see when clicking:
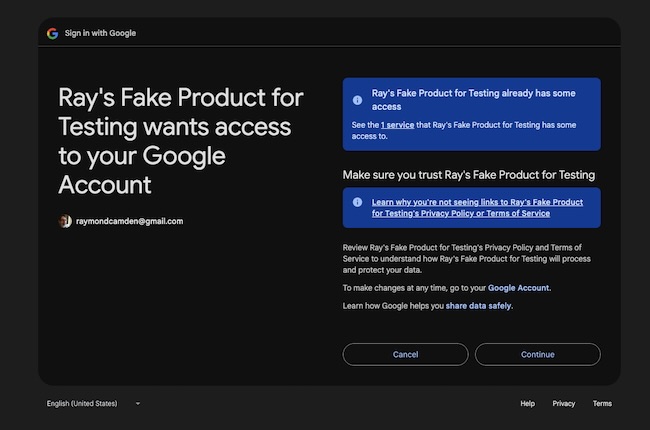
This is a fairly standard UI. Each provider will have their own look and feel, but most users should be pretty familiar with it.
The Callback Page
After logging in, the provider (Google in this case) redirects the user back. This next page doesn't have any output as it just handles the result:
---
const CLIENT_ID = process.env.CLIENT_ID;
const CLIENT_SECRET = process.env.CLIENT_SECRET;
const REDIRECT_URL = process.env.REDIRECT_URL;

const code = Astro.url.searchParams.get('code') || '';
const error = Astro.url.searchParams.get('error') || '';

if(error !== '') {
    console.error('Error!!', error);
    Astro.session?.set('error',error);
    return Astro.redirect('/');
}

// get our access token
const params = new URLSearchParams();
params.append('client_id', CLIENT_ID);
params.append('client_secret', CLIENT_SECRET);
params.append('grant_type', 'authorization_code');
params.append('redirect_uri', REDIRECT_URL);
params.append('code', code);

const atReq = await fetch('https://oauth2.googleapis.com/token', {
    method: 'POST',
    headers: {
        'Accept': 'application/json',
        'Content-Type': 'application/x-www-form-urlencoded'
    },
    body: params
});

const at = await atReq.json();
console.log('at', at);

if(at.error) {
    Astro.session?.set('error',at.error);
    return Astro.redirect('/');
}

Astro.session?.set('access_token', at.access_token, { ttl: at.expires_in });

return Astro.redirect('/events');
---
From the top, I first look in the URL for either the code or error. If there was an error, I set the value in the session and redirect back to the first page, which as you (hopefully) remember, will pick it up, delete it, and render it.
If there wasn't an error, I then exchange the code for an access token. As I mentioned, the access token is short lived, and what's cool is that Astro sessions have a way to handle that - you can see it in the ttl object when I set the value. I'm going to touch on that in a bit.
The Events Page
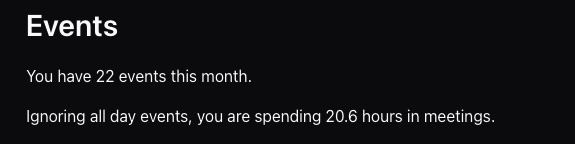
After logging in, I render the events page. Now technically, you can skip this entire section as it's less OAuth and more Google API usage, but I'll show it for completeness. My "demo" looks at your events for the month, filters out all day events, and reports on how many hours you spend in meetings. I used Gemini AI to write those functions for me.
---
import BaseLayout from '../layouts/BaseLayout.astro';

let token = await Astro.session?.get('access_token');

/**
 * Fetches Google Calendar events for the current month.
 * @param {string} accessToken - A valid OAuth2 access token.
 */
async function getCalendarEventsForCurrentMonth(accessToken) {
    const now = new Date();

    // Calculate start of current month
    const startOfMonth = new Date(now.getFullYear(), now.getMonth(), 1).toISOString();

    // Calculate start of next month
    const startOfNextMonth = new Date(now.getFullYear(), now.getMonth() + 1, 1).toISOString();

    const calendarId = 'primary'; // Use 'primary' for the user's main calendar
    const url = new URL(`https://www.googleapis.com/calendar/v3/calendars/${calendarId}/events`);

    // Set query parameters
    url.searchParams.append('timeMin', startOfMonth);
    url.searchParams.append('timeMax', startOfNextMonth);
    url.searchParams.append('singleEvents', 'true'); // Expands recurring events into instances
    url.searchParams.append('orderBy', 'startTime');

    try {
        const response = await fetch(url, {
            method: 'GET',
            headers: {
                'Authorization': `Bearer ${accessToken}`,
                'Accept': 'application/json'
            }
        });

        const data = await response.json();

        if (!response.ok) {
            throw new Error(`Google API Error: ${data.error.message}`);
        }

        return data.items; // This is the array of event objects
    } catch (error) {
        console.error('Failed to fetch events:', error);
    }
}

/**
 * Calculates the total duration of timed Google Calendar events, skipping all-day events.
 * @param {Array} events - The 'items' array from the Google Calendar API response.
 * @returns {number} - Total duration in hours.
 */
function calculateTimedHours(events) {
    if (!events || events.length === 0) return 0;

    const totalMilliseconds = events.reduce((total, event) => {
        // Skip all-day events (they have 'date' but no 'dateTime')
        if (!event.start.dateTime || !event.end.dateTime) {
            return total;
        }

        const start = new Date(event.start.dateTime);
        const end = new Date(event.end.dateTime);

        const duration = end.getTime() - start.getTime();

        return total + (duration > 0 ? duration : 0);
    }, 0);

    const hours = totalMilliseconds / (1000 * 60 * 60);

    // Round to one decimal place and ensure it returns as a number
    return Math.round(hours * 10) / 10;
}

const events = await getCalendarEventsForCurrentMonth(token);
const totalHours = calculateTimedHours(events);

---

<BaseLayout pageTitle="Events">

    <h2>Events</h2>

    <p>
        You have { events.length } events this month.
    </p>

    <p>
        Ignoring all day events, you are spending { totalHours} hours in meetings.
    </p>
</BaseLayout>
In case your curious, this is my report, but note this does not include my work calendar nor my wife's calendar that I share. The real number is probably 10X.
The Middlware
The very last bit was the middleware. It has two jobs:
- If the user is not logged in, and they are trying to access
/events, redirect them home. - If the user is logged in and they are not accessing
/events, push them there.
This particular logic will, of course, vary on your site and what you allow to be seen while not logged in and vice versa. Astro's middleware support is really simple. I added src/middleware.js and used this code:
/*
If they have an access token and are NOT on /events, go there
If they don't have one and are ON /events, go to /
*/

export async function onRequest (context, next) {

    let token = await context.session.get('access_token');
    console.log('path', context.url.pathname);

    if(token) {

        // are they trying to load / or /callback?
        if(context.url.pathname === '/' || context.url.pathname === '/callback') {
            console.log('redirecting cuz logged in and not events');
            return context.redirect('/events');
        }

    } else if(context.url.pathname === '/events') {
        console.log('redirecting cuz not logged in and events req');
        return context.redirect('/');
    }

    return next();
};
And that's it!
Conclusion
Ok, I need to riff a bit on some details that may or may not interest you, so before I do that - here's a link to the full code: https://github.com/cfjedimaster/astro-tests/tree/main/oauthtest1
Alright, there was one thing in this demo that kinda confused me a bit. In my mind, a 'session' is usually cookie-based such that a cookie identifies the user and the server associates that with data. I wrote my initial code on Saturday and when I tested on Sunday, my session still persisted, but the access token I had no longer worked. That was easy to fix - I added ttl, but from what I can tell, when using Astro sessions and the Node adapter specifically, the cookie set on your browser is a Session cookie, which persists as long as the tab is open. The same applies to SessionStorage as well.
None of this is 'wrong' of course, it just wasn't what I was expecting, and I'm curious if the other adapters, like the Netlify and Cloudflare ones, may act differently. I need to test this. If it's consistent, I could see then always using ttl when setting session values. The other question I have is - given a value with a ttl, does it always expire at that time, or does it auto renew on every hit. If so, and I wasn't using OAuth, I'd probably have logic to refresh the value one very hit so your session persists as you use the site. Yay - more Astro code to play with!
Photo by Andy Holmes on Unsplash