Working with IBM MobileFirst and the Ionic Framework
Edit on March 30, 2015: Please see my follow up here for a few small tweaks: Working with IBM Mobile First and Ionic – a follow up
A few weeks ago I blogged about using hybrid mobile applications and MobileFirst. Today I'm going to demonstrate how to work with Ionic and MobileFirst. What follows is a combination of the steps necessary for bringing any existing Cordova application into MobileFirst along with things necessary for Ionic specifically. As before, credit goes to my coworker Carlos Santana for figuring these steps out. I've also recorded a video of the process you can watch at the end of this blog post.
Create, and Start, your MF Server
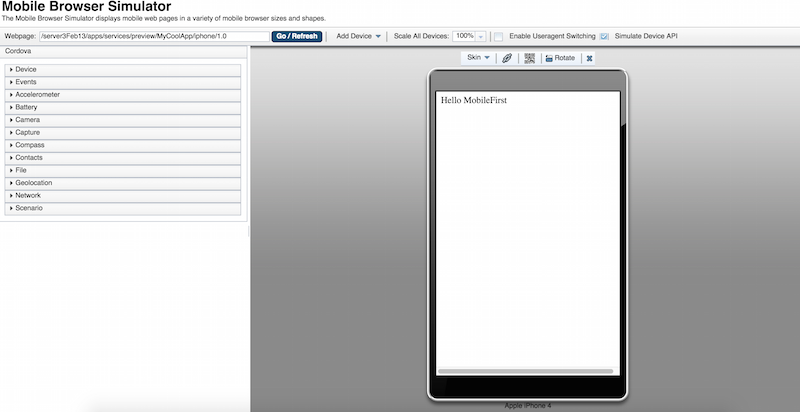
To begin, I'm assuming you've got a MobileFirst server up and running already with a hybrid application. If you don't remember how to do that, please read my earlier blog post where I walk you through the commands you have to enter at the command line.I always take baby steps, so once you have your server running, confirm everything is kosher by opening up the console and running your app in the Mobile Browser Simulator.
Set up the Bits
Ok, at the command line, or in Explorer/Finder, move the common folder elsewhere. Remember that the common folder is where your web assets live. You're going to want to copy some bits from this folder so for now don't delete it.Next, grab a copy of Ionic. I'm assuming you've already installed Ionic, but if not, follow the installation instructions. Ionic's CLI will normally create a new project as a Cordova project, but all we want are the web assets. The CLI has a flag for that, --no-cordova. You can create a new application without a full Cordova project like so:
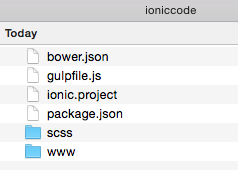
ionic start --no-cordova ioniccode blank
Notice I used the blank template and a folder called ioniccode. Open that folder up and you will see the following assets:
Copy that www folder into the root of your app folder and rename it common. Your app folder should then look something like this:
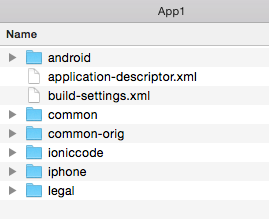
Again, both my original common folder (common-orig in the screen shot above) and the Ionic folder (ioniccode) can be removed later. As I said, I'm keeping them in so I can copy some bits over.
Update the Code
Ok, now you need to update the code a bit. Your common folder is a copy of the Ionic "Blank" starter, but what I describe here would apply to the other templates as well.
First, we need to make some modifications to the index.html file:
- You need to comment out (or just remove) cordova.js. This is necessary because MobileFirst will inject the script tag automatically.
<!-- <script src="cordova.js"></script> --> - You need to copy in MobileFirst's jQuery alias.
<script>window.$ = window.jQuery = WLJQ;</script> - You need to add a new file to include the MobileFirst initialization stuff. Technically you don't need to add a new file, you could modify the existing app.js, but I think it makes sense to break this out into a new file. The default MobileFirst template uses three files, but we can combine them into one. I'm calling mine wlInit.js. MobileFirst used to be called Worklight, and a lot of the code uses "WL" as an acronym, so I used it in my file as well.
<script src="js/wlInit.js"></script>
Here is the completely updated index.html file.
<!DOCTYPE html>
<html>
  <head>
    <meta charset="utf-8">
    <meta name="viewport" content="initial-scale=1, maximum-scale=1, user-scalable=no, width=device-width">
    <title></title>

    <link href="lib/ionic/css/ionic.css" rel="stylesheet">
    <link href="css/style.css" rel="stylesheet">
	<script>window.$ = window.jQuery = WLJQ;</script>

    <!-- IF using Sass (run gulp sass first), then uncomment below and remove the CSS includes above
    <link href="css/ionic.app.css" rel="stylesheet">
    -->

    <!-- ionic/angularjs js -->
    <script src="lib/ionic/js/ionic.bundle.js"></script>

    <!-- cordova script (this will be a 404 during development) -->
	  <!--
    <script src="cordova.js"></script>
		-->
    <!-- your app's js -->
    <script src="js/app.js"></script>
	<script src="js/wlInit.js"></script>
  </head>
  <body ng-app="starter">

    <ion-pane>
      <ion-header-bar class="bar-stable">
        <h1 class="title">Ionic Blank Starter</h1>
      </ion-header-bar>
      <ion-content>
      </ion-content>
    </ion-pane>
  </body>
</html>
Next, open up style.css. This is blank (except for a comment) in the Ionic template, but we need to add the following style declaration:
html, body {
    height: 100%;
}
This is required because the application ends up with a 0% height when run under MobileFirst. Odd - but just go with it.
Now open app.js. In the run() portion there is code that works with the Ionic keyword plugin. For now, we're going to simply disable it. In a later blog post I'll talk about working with plugins and MobileFirst, but for now, you can safely comment it out.
// Ionic Starter App

// angular.module is a global place for creating, registering and retrieving Angular modules
// 'starter' is the name of this angular module example (also set in a  attribute in index.html)
// the 2nd parameter is an array of 'requires'
angular.module('starter', ['ionic'])

.run(function($ionicPlatform) {
  $ionicPlatform.ready(function() {
    // Hide the accessory bar by default (remove this to show the accessory bar above the keyboard
    // for form inputs)
	  /*
    if(window.cordova && window.cordova.plugins.Keyboard) {
      cordova.plugins.Keyboard.hideKeyboardAccessoryBar(true);
    }
	*/
    if(window.StatusBar) {
      StatusBar.styleDefault();
    }
  });
})
Ok, so for the last part, we need to create wlInit.js. As I said, this is code that handles initializing MobileFirst stuff. In later blog posts, I'll demonstrate some of those cool features with Ionic, but for now, we're going to keep the file pretty simple. You can copy and paste the contents of initOptions.js and main.js directly into your new file. (And again, this is a personal preference. If you want to keep them in two separate files, that's fine too, just be sure to include them both back in index.html.)
We need to do one more small tweak. When using Ionic and a "regular" Cordova project, there is a hook that applies a style for Android and iOS. We don't have those hooks under MobileFirst, so we have to do it by hand, but that's easy enough. The MobileFirst JavaScript API has a getEnvironment function that returns information about the running environment. We can use that to sniff iPhone and iPad versus Android. (And again, credit for this goes to Carlos.) Here is the entire file with that modification within wlCommonInit.
// Uncomment the initialization options as required. For advanced initialization options please refer to IBM MobileFirst Platform Foundation Knowledge Center
var wlInitOptions = {
// # To disable automatic hiding of the splash screen uncomment this property and use WL.App.hideSplashScreen() API
//autoHideSplash: false,
// # The callback function to invoke in case application fails to connect to MobileFirst Server
//onConnectionFailure: function (){},
// # MobileFirst Server connection timeout
//timeout: 30000,
// # How often heartbeat request will be sent to MobileFirst Server
//heartBeatIntervalInSecs: 20 * 60,
// # Enable FIPS 140-2 for data-in-motion (network) and data-at-rest (JSONStore) on iOS or Android.
// Requires the FIPS 140-2 optional feature to be enabled also.
//enableFIPS : false,
// # The options of busy indicator used during application start up
//busyOptions: {text: "Loading..."}
};
if (window.addEventListener) {
window.addEventListener('load', function() { WL.Client.init(wlInitOptions); }, false);
} else if (window.attachEvent) {
window.attachEvent('onload', function() { WL.Client.init(wlInitOptions); });
}
function wlCommonInit(){
/*
* Use of WL.Client.connect() API before any connectivity to a MobileFirst Server is required.
* This API should be called only once, before any other WL.Client methods that communicate with the MobileFirst Server.
* Don't forget to specify and implement onSuccess and onFailure callback functions for WL.Client.connect(), e.g:
*
* WL.Client.connect({
* onSuccess: onConnectSuccess,
* onFailure: onConnectFailure
* });
*
*/
// Common initialization code goes here
var env = WL.Client.getEnvironment();
if(env === WL.Environment.IPHONE || env === WL.Environment.IPAD){
document.body.classList.add('platform-ios');
} else if(env === WL.Environment.ANDROID){
document.body.classList.add('platform-android');
}
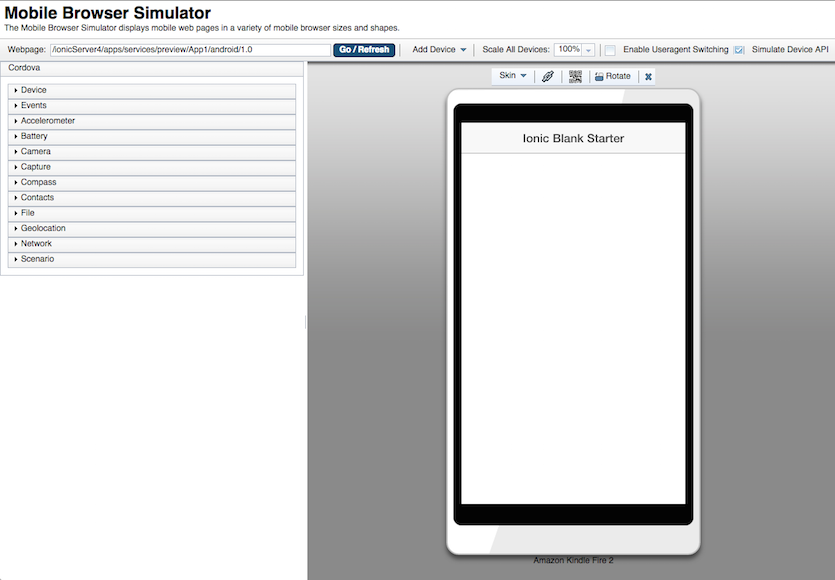
}And that's it. Once you build/deploy (and don't forget you can do that with mfp bd), you should then see your MobileFirst application using the awesome power of Ionic!
I've attached my copy of the common folder to this blog entry. Also, Carlos created a GitHub repo with modified versions of all the Ionic templates here: https://github.com/csantanapr/mfp-ionic-templates.
Finally, you can watch a video of this entire process here. Sit back and enjoy the silky sounds of my caffeine-fueled voice.